If you can’t play Free Fire – Battlegrounds on your cell phone, or you simply prefer to play on the computer, we have a very simple solution. Follow our guide and learn how to install and configure Free Fire for PC.
In a few minutes, you will be able to compete in this game against players from all over the world, in a bloody Battle Royale for mobile phones and tablets.
1. Download and install the LDPlayer Android emulator
It’s no surprise to say that mobile games, by themselves, don’t work on computers. They are done in a different way, with other types of requirements and platforms to play. For this reason, it is mandatory to use an emulator to play on PC.
Our recommendation is to use the LDPlayer Android emulator , since most games run perfectly. When you install it, it will ask you for your Google Play account information, as if your computer were a cell phone.
It is the most complete emulator there is, as it allows you to make graphical alterations, configure controls, among other details. These options allow us to play many Android games with good fluidity. If you like to handle these types of options to improve the performance of Free Fire , or you have a modest PC, this emulator is perfect for you!
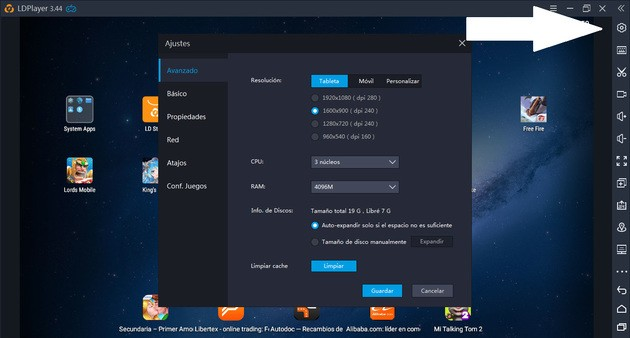
As LDPlayer is quite customizable, we can improve FPS rates in many games, including Free Fire . It is possible to change resolutions, RAM usage, shortcuts, etc. The image above shows where the settings button is located. A menu will appear, and that’s where you can do everything we’ve mentioned.
2. Download Free Fire
You can download Free Fire on LDPlayer through two virtual stores: with the Google Play Store, as if you were on a smartphone or tablet; or with the LD Store itself, an application from the creators of the emulator. The LD Store icon is on the program’s home screen.
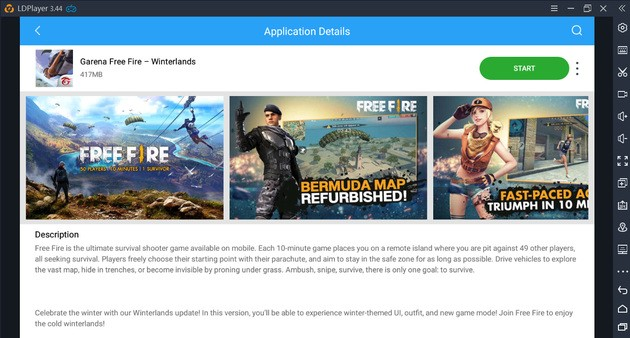
To download the game, just search for ” Free Fire ” in the LD Store. Click on the game and press “Install”, just as you would with any Android application. All you have to do is wait a little until the download finishes, as it doesn’t take up much.
Start the game from the same virtual store or by pressing the icon on the main screen. If you do not have an account, you must remember that registration is mandatory and, in addition, this will allow you to save your experience, statistics, victories, items and unlocked characters.
3. Set up controls
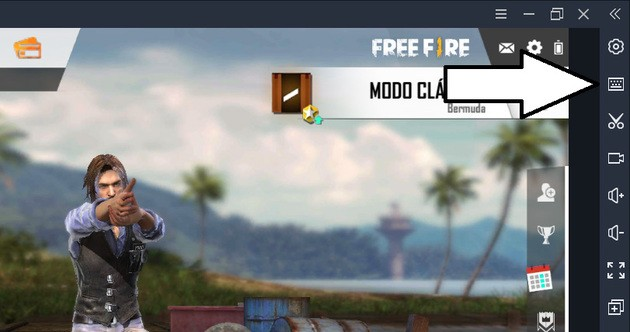
To play Free Fire like any shooting game, you need to configure the controls in LDPlayer. This way, you will make better use of the keyboard and mouse to move, aim, drive and, of course, take lots of headshots .
To configure, we have to press the keyboard button located in the upper right corner of the program. We show it to you in the following image:
As this game has been created to play on cell phones and tablets, there are different areas on the screen dedicated to different touch commands. To play with keyboard and mouse, simply assign the keys you prefer for each function. In the following image you have an example of a final configuration, but you can change the buttons as you want.
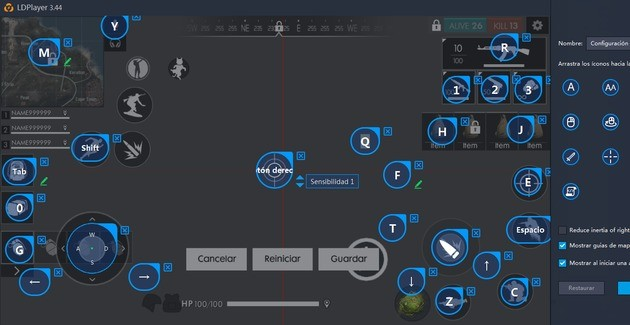
We recommend first going to the Free Fire settings , in the “Controls” section and the “Custom HUD” button. Once you see a screen similar to the image above, enter the LDPlayer menu to configure controls. Change, create and remove buttons as you like. If you do it this way, you can prepare the controls before entering a game and not during, as it can be dangerous.
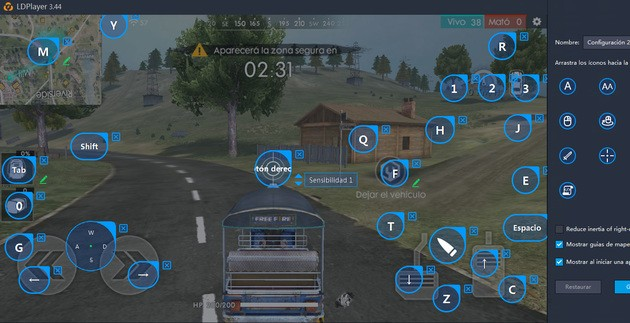
However, to properly configure vehicle control, it is necessary that we be in a game. Get in a car or motorcycle, make sure you’re far away from other players, and optimize the buttons as needed. You must position the buttons well to accelerate, brake and operate the vehicle.
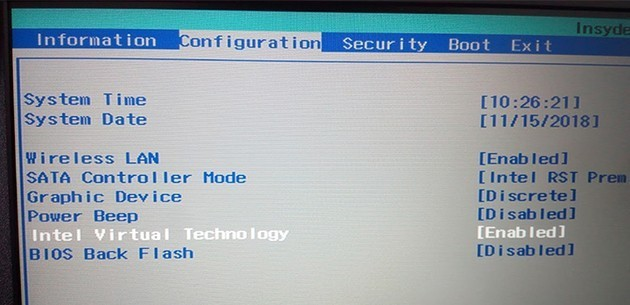
Improve emulator performance
In addition to these graphical system alterations, which are highly recommended for older computers, it is also good to activate virtualization. That means that your PC, to run the emulator, will use more resources and allow the games to run much better. And what does it mean that they run much better? It will be more comfortable to play and easier to win!
To enable this virtualization in Windows, follow these steps:
- Press the F2 or Delete button when your computer is turning on.
- Access the configuration (Configuration).
- Find the Virtualization/Virtual Technology option and select “Enabled.”
When you have everything set up, you will be ready to face other players and achieve that long-awaited victory. Of course, you will need to follow a specific strategy.


